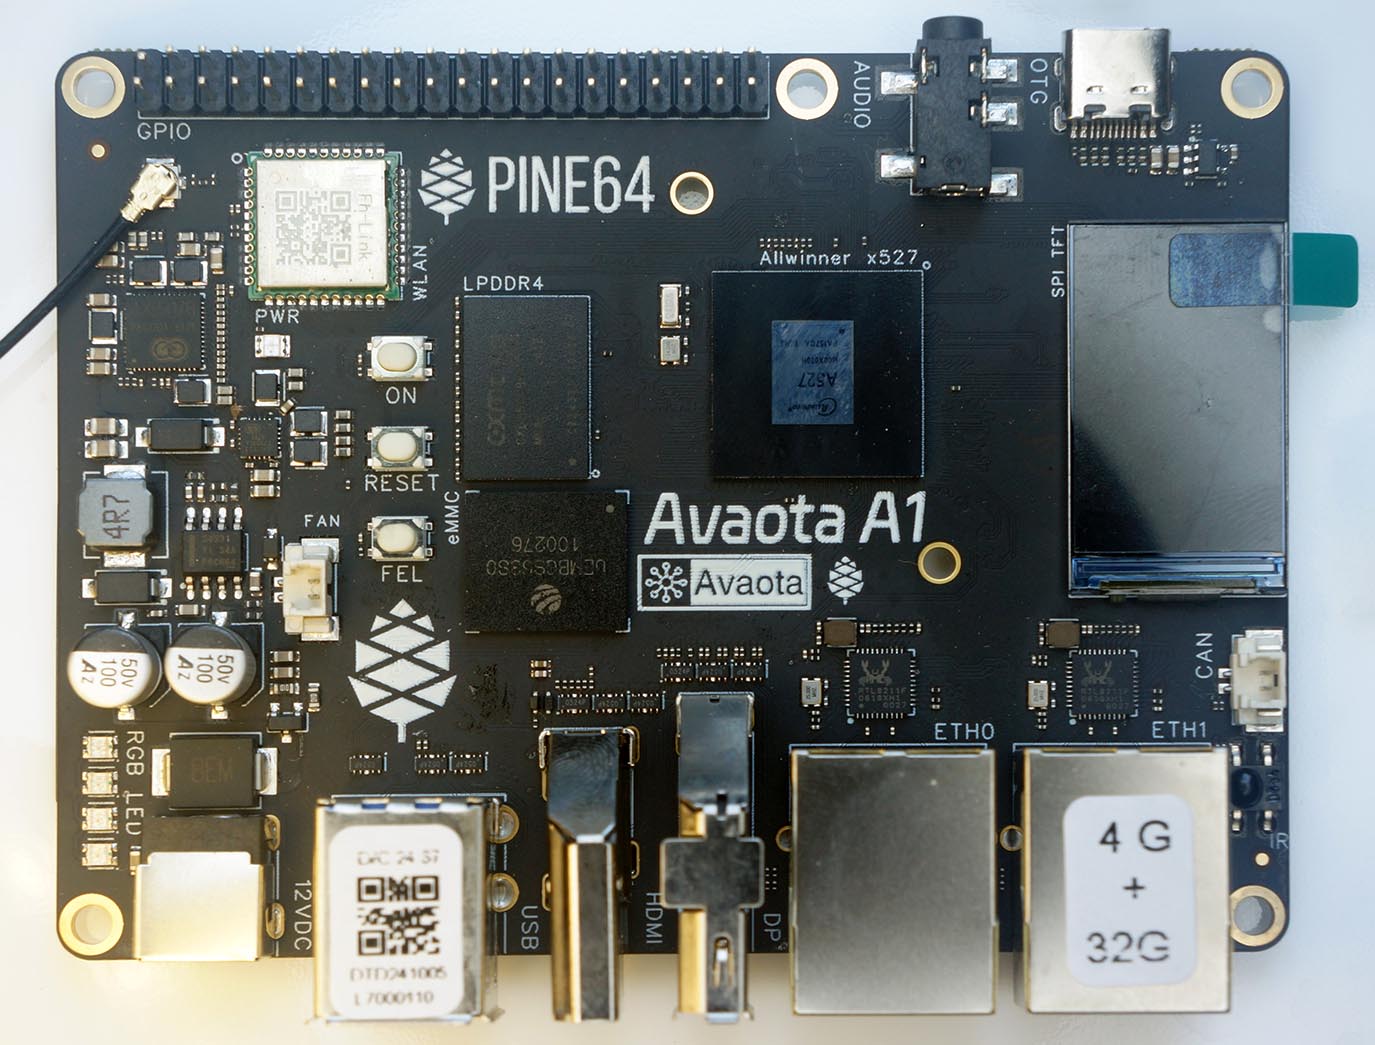
PINE64 Yuzuki Avaota-A1
Avaota-A1 is an ARM64 Single-Board Computer based on the Allwinner A527 SoC.
Features
- System on Chip: Allwinner A527
CPU: Octa-Core ARM Cortex-A55
GPU: ARM G57 MC1
Interrupt Controller: ARM GIC-600 (Generic Interrupt Controller v3)
RAM: 2GB or 4GB LPDDR4 SDRAM
Internal Storage: 16GB or 32GB eMMC
External Storage: MicroSD
Ethernet: Dual Gigabit Ports
Wireless: WiFi 6, Bluetooth 5.4
I/O: UART, SPI, I2C, USB 3.0 OTG
Serial Console
A USB Serial Adapter (CH340 or CP2102) is required to run NuttX.
Connect the USB Serial Adapter to the Avaota-A1 Serial Console at:
USB Serial |
Avaota-A1 Pin |
|---|---|
GND |
Pin 6 (GND) |
RX |
Pin 8 (UART0 TX) |
TX |
Pin 10 (UART0 RX) |
On the USB Serial Adapter, set the Voltage Level to 3V3.
Connect Avaota-A1 to our computer with the USB Serial Adapter. On our computer, start a Serial Terminal and connect to the USB Serial Port at 115.2 kbps:
$ screen /dev/ttyUSB0 115200
NuttX will appear in the Serial Console when it boots.
ARM64 Toolchain
Before building NuttX, download the toolchain for xPack GNU AArch64 Embedded GCC (aarch64-none-elf).
Add the downloaded toolchain xpack-aarch64-none-elf-gcc-.../bin
to the PATH Environment Variable.
Check the ARM64 Toolchain:
$ aarch64-none-elf-gcc -v
Building
To build NuttX, install the prerequisites and
clone the git repositories for nuttx and apps.
Configure the NuttX project and build the project:
$ cd nuttx
$ tools/configure.sh avaota-a1:nsh
$ make
This produces the NuttX Kernel nuttx.bin. Next, build the NuttX Apps Filesystem:
$ make export
$ pushd ../apps
$ tools/mkimport.sh -z -x ../nuttx/nuttx-export-*.tar.gz
$ make import
$ popd
$ genromfs -f initrd -d ../apps/bin -V "NuttXBootVol"
This generates the Initial RAM Disk initrd.
Package the NuttX Kernel and Initial RAM Disk into a NuttX Image:
$ head -c 65536 /dev/zero >/tmp/nuttx.pad
$ cat nuttx.bin /tmp/nuttx.pad initrd >Image
The NuttX Image Image will be copied to a microSD Card in the next step.
Booting
NuttX boots on PinePhone via a microSD Card. To prepare the microSD Card, download the
AvaotaOS Image AvaotaOS-...-noble-gnome-arm64-avaota-a1.img.xz from
github.com/AvaotaSBC/AvaotaOS.
Write the downloaded image to a microSD Card with Balena Etcher.
Copy the file Image from the previous section
and overwrite the file on the microSD Card.
Check that Avaota-A1 is connected to our computer via a USB Serial Adapter at 115.2 kbps:
$ screen /dev/ttyUSB0 115200
Insert the microSD Card into Avaota-A1 and power up. NuttX boots and NuttShell (nsh) appears in the Serial Console.
To see the available commands in NuttShell:
$ help
Configurations
nsh
Basic configuration that runs NuttShell (nsh). This configuration is focused on low level, command-line driver testing. Built-in applications are supported, but none are enabled. Serial Console is enabled on UART0 at 115.2 kbps.
Peripheral Support
NuttX for Avaota-A1 supports these peripherals:
Peripheral |
Support |
NOTES |
|---|---|---|
UART |
Yes |